In this tutorial, I will show you how to create a QR Code design.
Step 1: Log in to get started
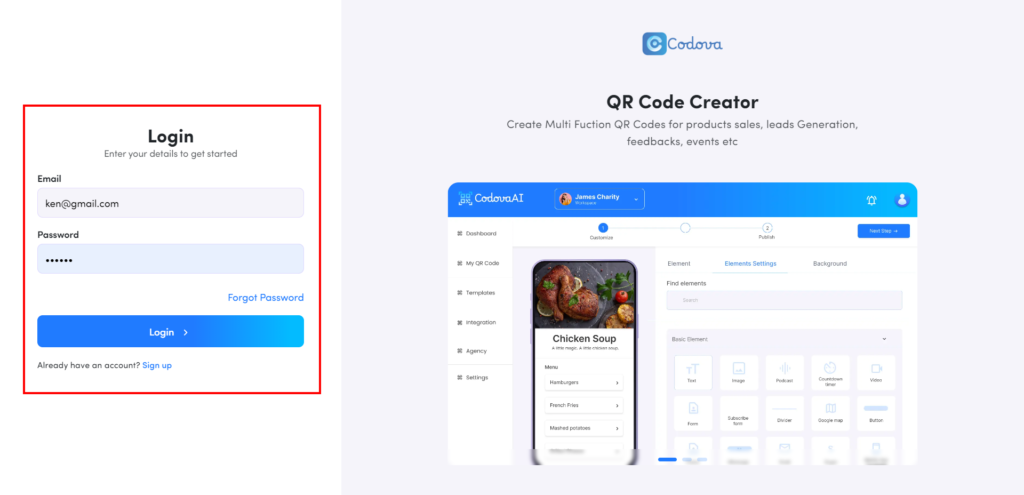
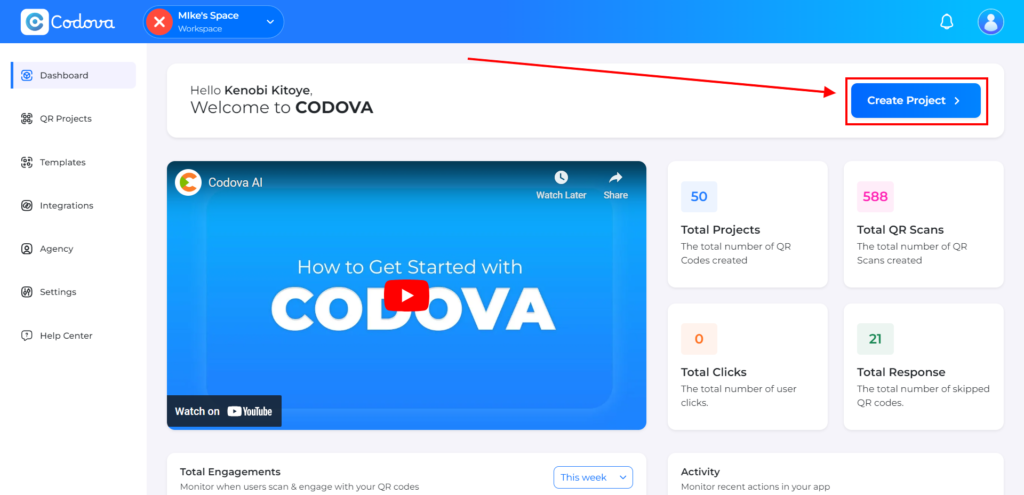
Step 2: Click on Create Project to create a new project
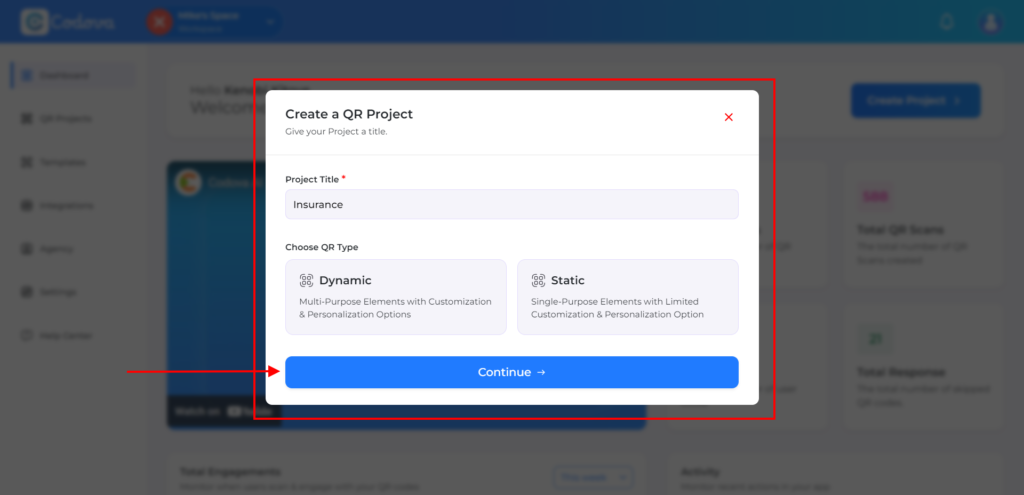
Step 3: Enter your project title, Choose QR Type, and click on Continue
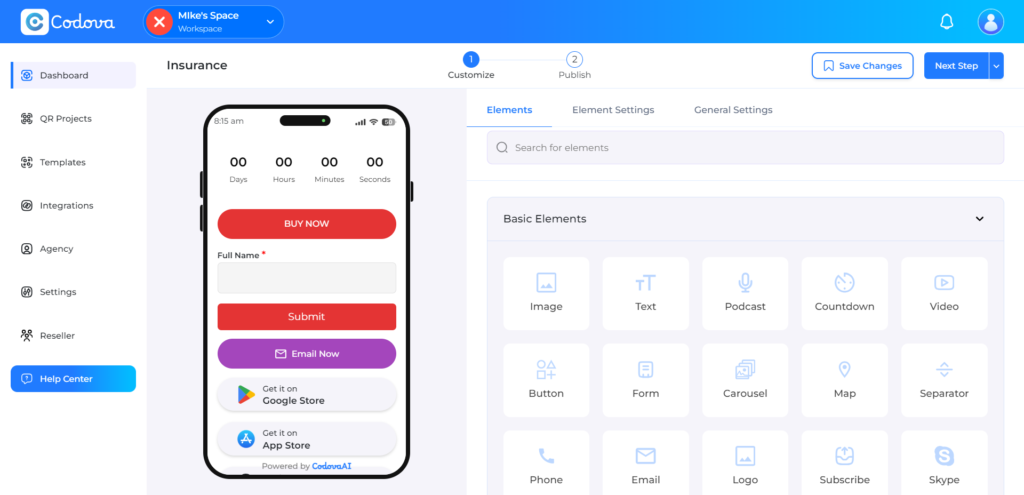
Step 4: Welcome to the editor where you’ll see all the elements.
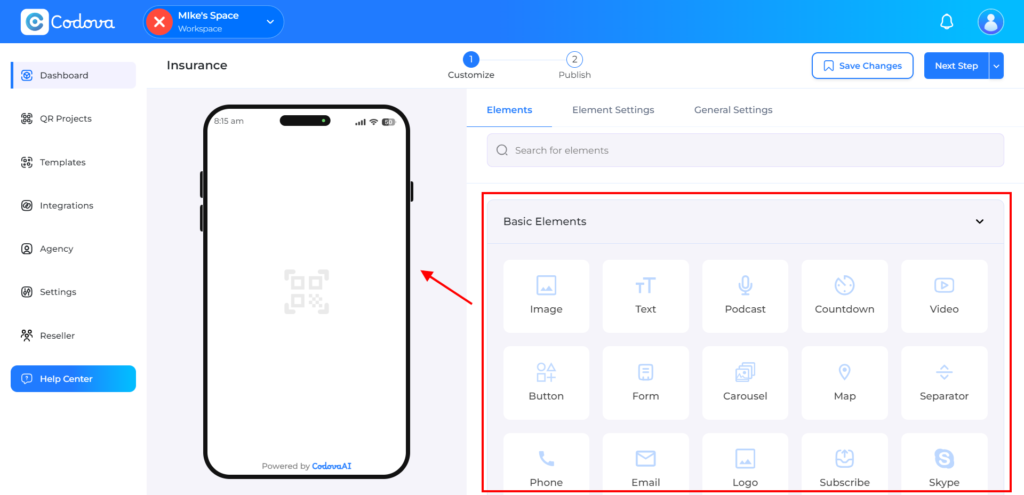
From the editor page, you can add various QR elements to your design.
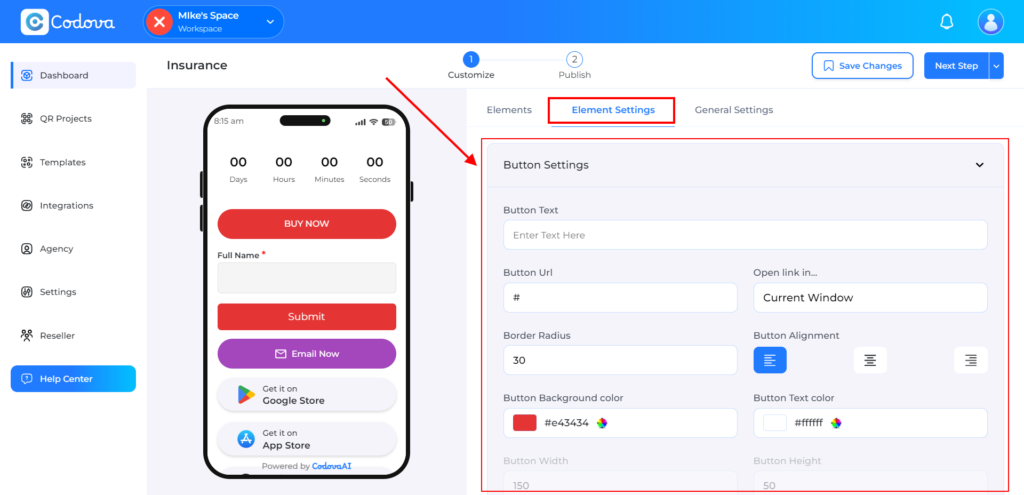
Step 5: When you add an element, the settings page will appear for you to customize that particular element.
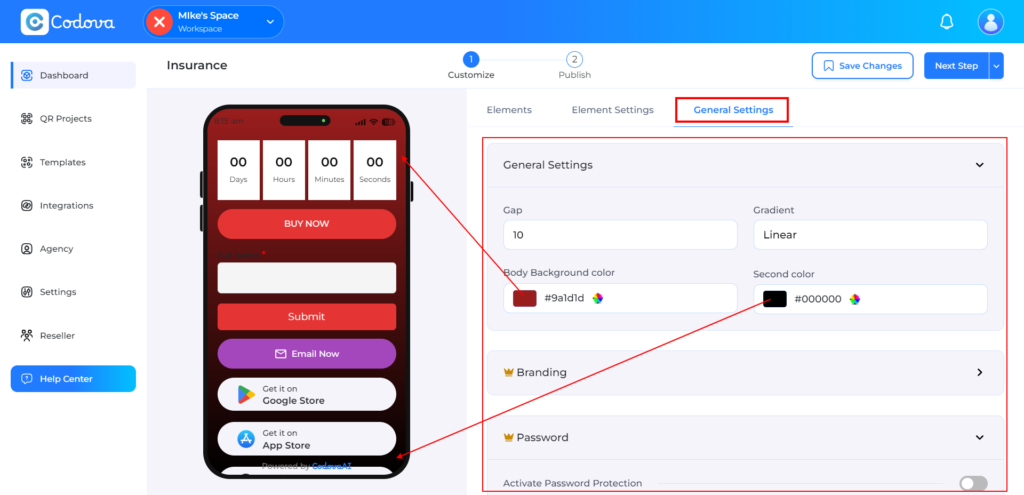
Step 6: When you add and customize an element, you can go to General Settings to make more edits to your QR page design.
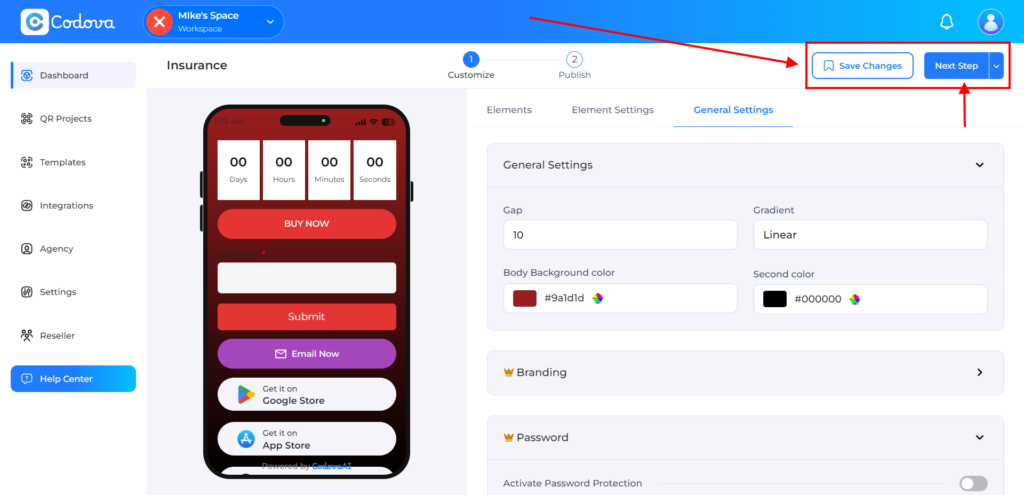
Step 7: When done customizing, save and click on Next Step
Step 8: This is where you’ll customize your QR Code. Select your preferred Pattern, Border style, and Marker Conter.

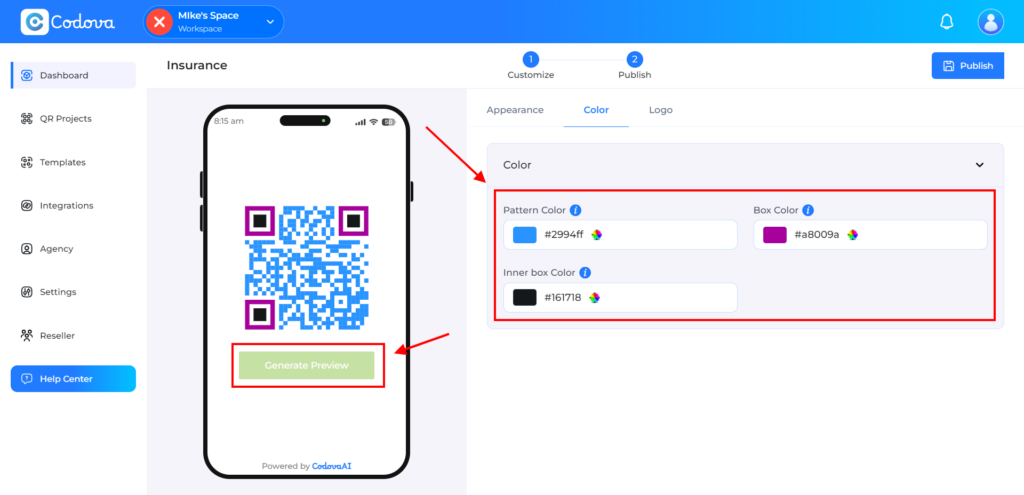
Step 9: Customize the color of your QR Code, after that click on Generate Preview to preview changes.
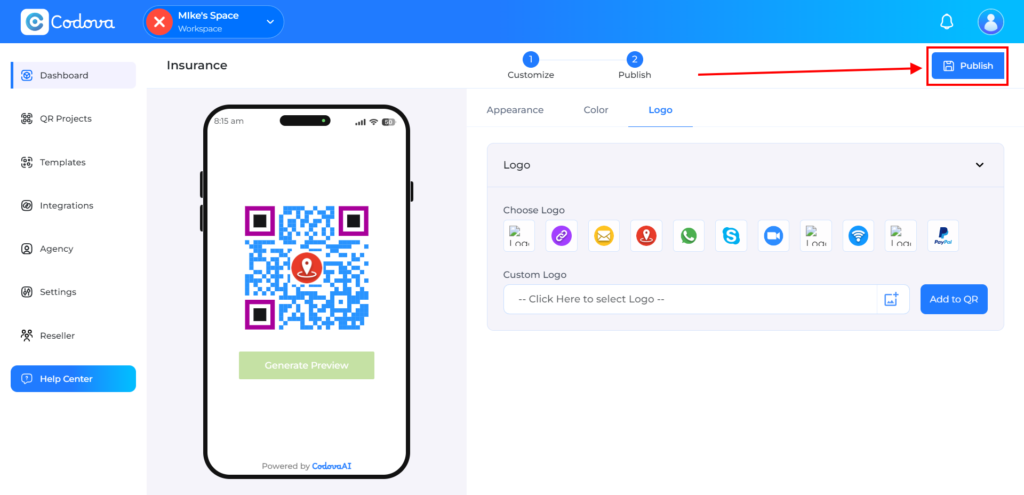
Step 10: Add a Logo to your QR Code. You can choose from the already listed Logos, or add directly from your local storage, when selected click on Add to QR. To preview the logo on the QR Code click on Generate Preview button.

Step 11: When done customizing, click on Publish
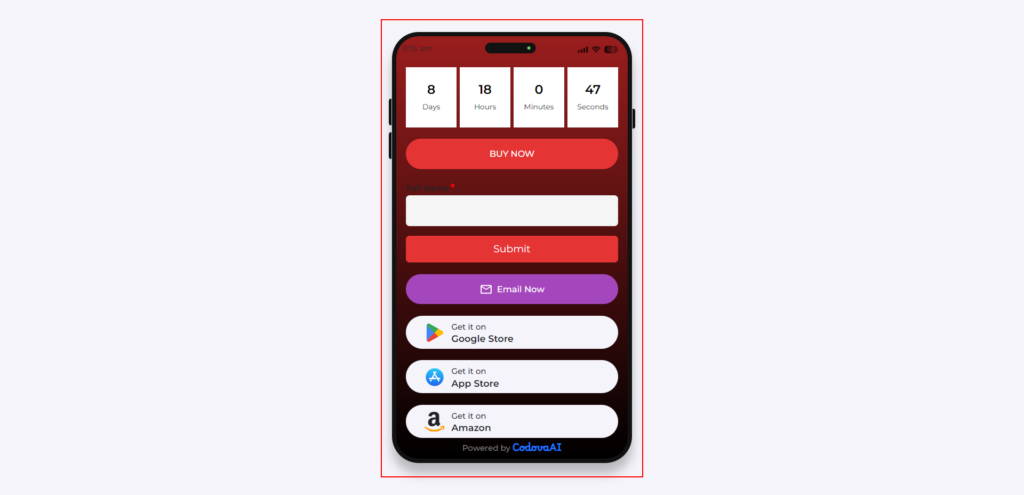
And there you have it, your QR Code and Page design successfully created and published. To view the QR Page, click on the arrow icon. You can also copy the embed code to embed the QR Code on any embeddable webpage.
You can also download the QR Code as JPEG, PNG, or SVG by clicking on the download button.

And that’s it for this tutorial, kindly contact us if you need any assistance.